方法一:
关闭ElasticSearch的xpack安全验证(即修改/docker/elasticsearch/config/elasticsearch.yml
中的xpack.security.enabled和xpack.security.transport.ssl.enabled为false);
重启ElasticSearch服务
重启好后用以下命令删除索引 .secutity-6
curl -XDELETE http://localhost:9204/.secutity-6
1orcurl -XDELETE   http://127.0.0.1:9200/.secutity-6
删除好后再重新按照上面设置密码的操作打开xpack验证重启ElasticSearch服务进入容器内部进行密码设置
怎么查看新加的索引名称:
修改config/elasticsearch.yml;注释掉 xpack.security.enabled: true这一行;
重启ES,查看下索引,发现多了一个.security-7
#查看Es连接状态
curl http://127.0.0.1:9200 -u elastic:123456
#修改密码
curl -XPOST -H "Content-type: application/json" -u elastic:123456 "http://127.0.0.1:9200/_xpack/security/user/elastic/_password?pretty" -d "{"""password""": """12345678"""}"
curl -XPOST -H "Content-type: application/json" -u elastic:123456 "http://127.0.0.1:9200/_xpack/security/user/logstash_system/_password?pretty" -d "{"""password""": """12345678"""}"
#查看索引
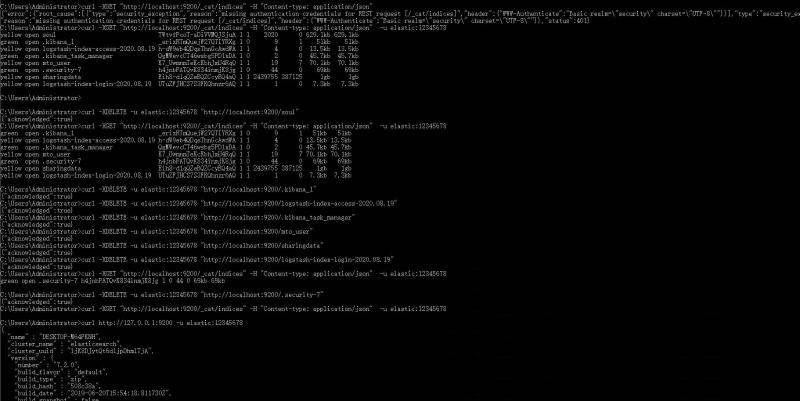
curl -XGET "http://localhost:9200/_cat/indices" -H "Content-type: application/json" -u elastic:12345678
#删除索引
curl -XDELETE -u elastic:12345678 "http://localhost:9200/soul"
curl -XDELETE -u elastic:12345678 "http://localhost:9200/.kibana_1"
curl -XDELETE -u elastic:12345678 "http://localhost:9200/logstash-index-access-2020.08.19"
curl -XDELETE -u elastic:12345678 "http://localhost:9200/.kibana_task_manager"
curl -XDELETE -u elastic:12345678 "http://localhost:9200/mto_user"
curl -XDELETE -u elastic:12345678 "http://localhost:9200/sharingdata"
curl -XDELETE -u elastic:12345678 "http://localhost:9200/logstash-index-login-2020.08.19"
curl -XDELETE -u elastic:12345678 "http://localhost:9200/.security-7"实操如下图:
方法二:
解决办法:创建一个新的临时用户,然后赋予这个用户超级管理员角色。
再退出外面,用这个用户修改密码。
/usr/后是你要修改密码的用户名,{}里面是你要设置的新密码
docker exec -it es10 bash
./bin/elasticsearch-users useradd tempchen -r superuser

curl -XPUT -u tempchen:tempchen http://127.0.0.1:9200/_xpack/security/user/elastic/_password -H "Content-Type: application/json" -d '
{
 "password": "elastic"
}'
windows下使用curl工具执行时,"里面的“要用三个“代替
curl -XPOST -H "Content-type: application/json" -u elastic:123456 "http://127.0.0.1:9200/_xpack/security/user/elastic/_password?pretty" -d "{"""password""": """12345678"""}"查看是否修改成功:
curl http://127.0.0.1:9200 -u elastic:123456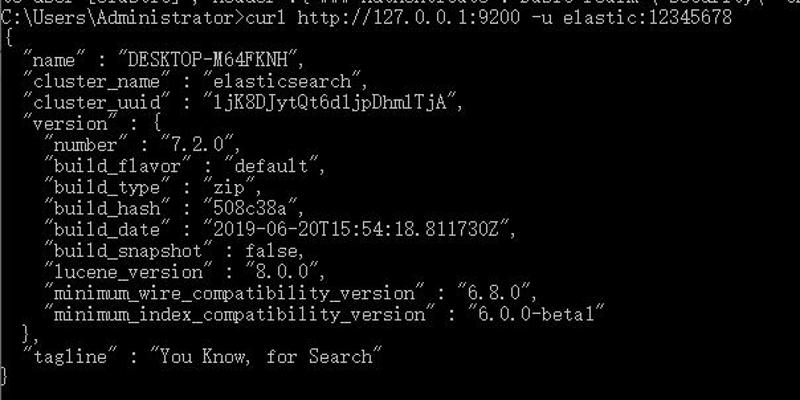
注意:本文归作者所有,未经作者允许,不得转载