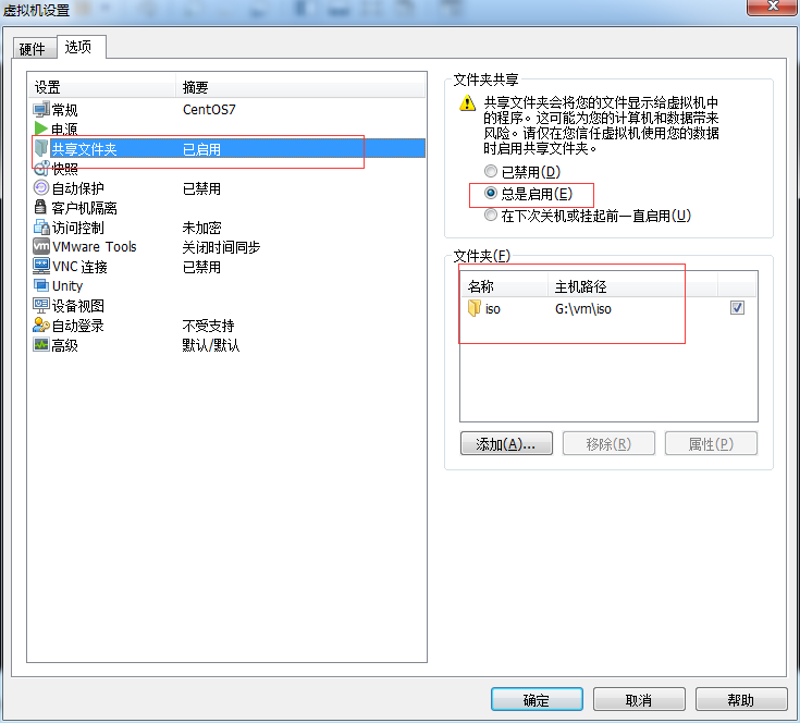
1.vm设置共享文件夹
非常简单一个截图带过:
2.安装VMware Tools
2.1 在虚拟机菜单中有安装VMware Tools工具的菜单,点击安装。
2.2 之后就可以看到虚拟机的CD/DVD就装入了一个linux.iso的镜像文件,将安装的VMware Tools镜像挂载到虚拟光驱中,而这个镜像文件就是VMware Tool的安装包,此时只是把安装包加载到了虚拟光驱,要把它复制到linux系统下的某一个文件夹中解压后才能安装。
1. 首先在文本登录界面,用你的根用户账号(root)和密码登录。
2. 然后挂载光驱设备,在命令行后键入“mount -t iso9660 /dev/cdrom /mnt”命令后回车。
3. 光驱挂载成功后,用“cd /mnt”命令进入/mnt目录下,再用“ls”命令显示其下的内容。这时发现多了一个文件:VMwareTools-10.0.10-4301679.tar.gz,这就是VMware Tools的Linux安装包。
4. 然后再把该文件拷贝到tmp目录下,键入“cp /VMwareTools-10.0.10-4301679.tar.gz /tmp”命令即可。
5. 现在虚拟机光驱的使命完成了,应该把它卸载,用命令“umount /dev/cdrom”即可。
6.接下来应该解压缩VMwareTools-10.0.10-4301679.tar.gz文件。首先进入tmp目录,用“cd /tmp”命令,然后用“tar zxf VMwareTools-10.0.10-4301679.tar.gz”命令将其解压缩,把它释放到默认目录下。
7. 然后用“cd vmware-tools-distrib”进入解压后的目录,用“ls”命令显示其下的内容,从中可以看到vmware-install.pl 是VMware Tools的安装程序。
8.运行./vmware-install.pl .pl,按照其要求设置即可。
注意:
1)执行这个命令可能会报错:
./vmware-install.pl: ./vmware-install.real.pl: /usr/bin/perl: 坏的解释器: 没有那个文件或目录可以执行命令yum groupinstall "Perl Support"来解决。
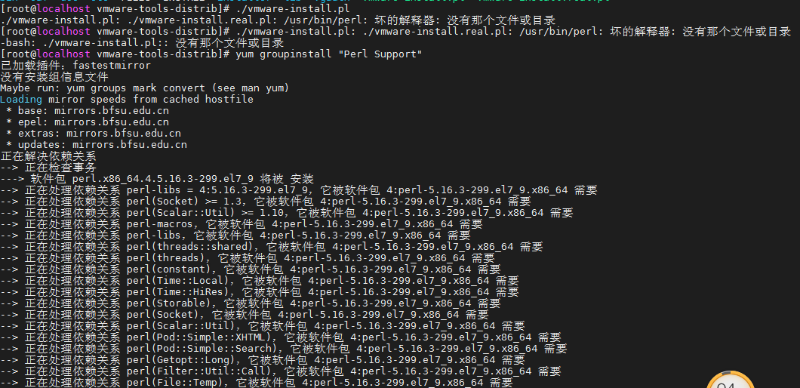
执行完成后,再次执行:./vmware-install.pl .pl就开始安装过程。
2) 在安装过程中,有个一个选项“The VMware Host-Guest Filesystem allows for shared folders between the host OS and the guest OS in a Fusion or Workstation virtual environment. Do you wish to enable this feature? [no] yes”默认选择为no,这里我们要选择yes,否则将不会出现hgfs文件夹。
3)安装vmware-tools出现”what is the location of the “ifconfig”program on your machine?”, 回车键后出现”The answer is invalid”.
出现此问题的错误是因为网络问题, 解决办法如下:
centos 系统
当出现”what is the location of the “ifconfig”program on your machine?”时直接输入“yes”,再回车即可,之后的安装也默认回车
4)出现What is the location of the gcc program on your machine?时直接输入空格no就可以略过了,不影响后面加载共享文件夹。
5)其他的直接y回车就可以了
3.挂载共享文件夹到/mnt/hgfs
3.1 查看/mnt/hgfs是否已经存在
[zhaojq@localhost ~] cd /mnt/hgfs/
[zhaojq@localhost hgfs]  pwd
/mnt/hgfs
3.2 vmware-hgfsclient 命令查看当前共享的目录
[root@localhost hgfs]# vmware-hgfsclient
iso
3.3 mount报错
[root@localhost hgfs]# sudo mount -t vmhgfs .host:/iso /mnt/hgfs
Error: cannot mount filesystem: No such device
3.4 解决报错问题,vmhgfs-fuse,需要安装工具包
yum install open-vm-tools-devel -y3.5 安装完后用vmhgfs-fuse挂载分享文件夹
vmhgfs-fuse .host:/iso /mnt/hgfs
4.查看挂载
退出/mnt/hgfs再重新进入输入ls就可以看到windows共享给centos虚拟机的共享文件夹。
5. 其他
5.1. 在本地创建一个目录作为Windows共享文件夹的挂载点:
mkdir /mnt/share
5.2. 修改该目录的权限:
sudo chmod -R 777 /mnt/share/
5.3. 现在,可以使用下面的命令挂载Windows共享:
sudo smbmount //<Windows电脑的名字或IP>/<Windows共享文件夹的名字> /<挂载点> -o username=<Windows用户名>,rw
例如,
sudo smbmount //192.168.0.102/Software /mnt/share -o username=ccr\\xzhong1x,rw
ccr是windows域名,xzhong1x是用户名
5.4. 完成传输文件后,可在终端上发出以下命令来断开挂载点:
sudo umount <挂载点>
例如,
sudo umount /mnt/share/
6. 参考
https://blog.csdn.net/mountzf/article/details/51503168
https://blog.csdn.net/weixin_36058293/article/details/80693275
注意:本文归作者所有,未经作者允许,不得转载